Overview
Millpay’s Electronic Invoicing solution enables merchants to quickly create and send branded invoices via email, allowing customers to pay securely with just one click.
Invoices include detailed line-by-line information, are automatically converted into PDF format, and are delivered with a secure payment link hosted within the Millpay Gateway environment. This eliminates the need for merchants to build or maintain their own payment acceptance page.
Customers can securely pay their invoice using a credit card or bank account (ACH). Sensitive payment data is processed within the secure gateway environment and never touches the merchant’s systems, helping reduce PCI compliance burden.
Merchants can create, manage, and track invoices directly from the Merchant Portal or through API integration, making the solution suitable for both manual and automated billing workflows.
Key Features
Supports multiple currencies
Accepts full or partial payments
Ability to assign a default processor per invoice
Fully brandable invoice emails and templates
Secure, hosted payment pages
Enhanced reporting for accurate and complete transaction records
Integrated with Product Manager for streamlined billing
API access for automated invoicing workflows
Quick setup — merchants can send their first invoice in minutes
Supports multiple payment methods, including Credit Card, ACH, and cash recording
Getting Started
To access the Invoicing page, you will need to have Invoicing active as a service. The merchant's user account will need to have Access Invoice checked off as a user permission.
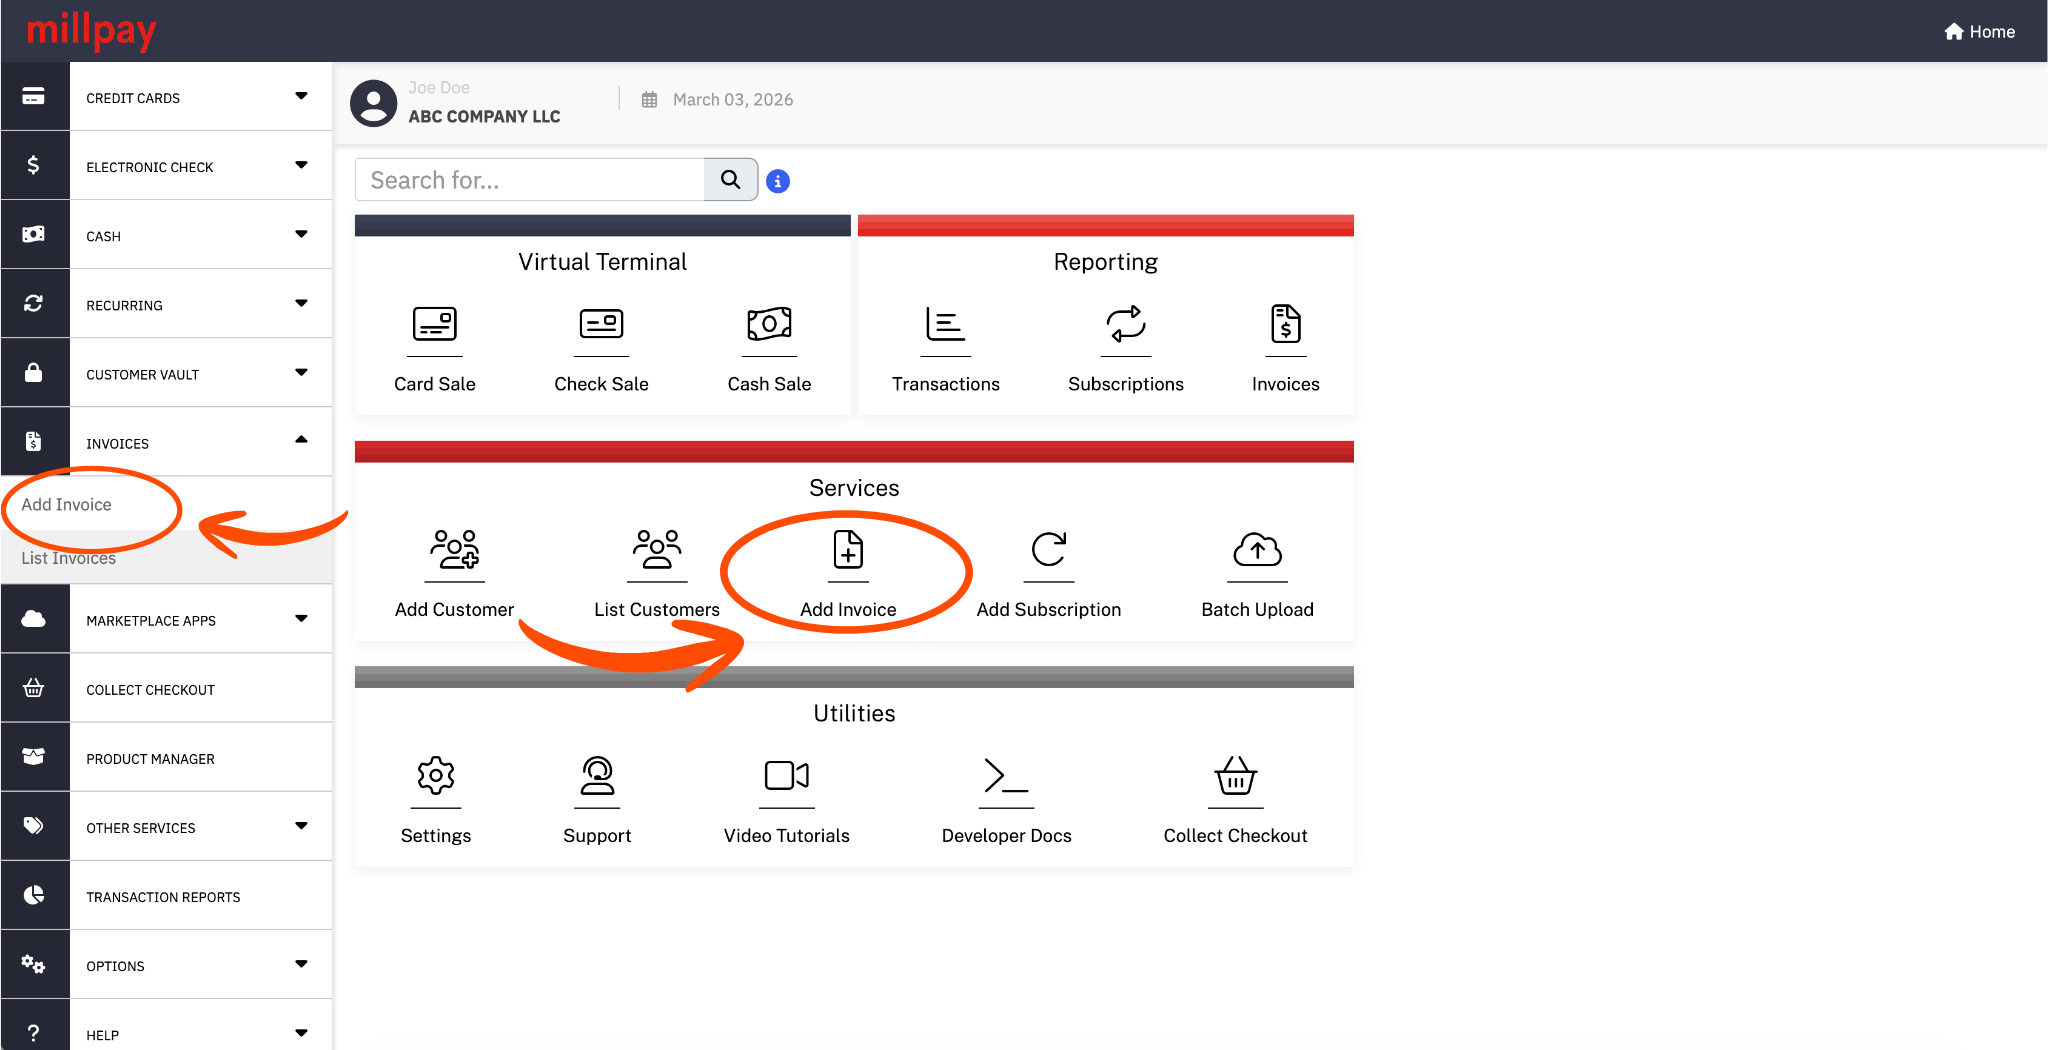
Primary user will have this permission set by default once Invoicing is activated to their account. The Primary user can add this permission to any of their sub-users as needed. This can be found in your Millpay Merchant Portal → Settings → User Accounts → select the username → under Permissions (at the bottom) check Access Invoice. Once Invoicing is activated, in the Millpay Merchant Portal, head over to the left side panel → click on Invoices, this will give them access to the Add Invoice and the List Invoice pages.
Enter the presented details as required such as Invoice Amount, Currency, Product Information, Invoice Terms, Customer Billing/Shipping Information and any additional custom fields.
- The required fields are the Amount (under Invoice Information) and Email Address (under Card Billing Address). The invoice will be sent to the email address provided here.
- You can select due dates on all new invoices. This option is under Invoice Information → Invoice Terms. They have the option to select from: Due Upon Receipt, 30 days, 60 days, 90 days, or Custom (you can enter the number of days until due).
- The Products table can be used to add-up products or services, and will autofill the total Invoice Amount when using the "Click to Set Amount" link (at the bottom right of the Product table).
- You can select a default processor, per payment type, on each individual invoice if they have multiple processors:
- One processor per allowed payment method can be specified per invoice.
- Only payment types with multiple options will be displayed in the Processors section (e.g. if you only has one Electronic Check processor, they won't see a dropdown to select an Electronic Check processor in the Processors section).
- When default processors are selected, payments processed through the payment link will process on that selected processor.
- Default processors can also be designated using Payment API when creating invoices.
- Invoices can be paid with cash, but only when paying from the Millpay Merchant Portal, not the link that’s emailed to the customer.
- You have the option to preview invoice PDFs before they are sent out to customers by clicking on the Preview PDF button. This will help you have a better feel for what their customers will experience when receiving an invoice.
- Sensitive billing information is not entered when creating an invoice since payment is rendered by the customer directly through the secure link.
Once the Invoice is created, the customer will receive an email with the following:
- An attached PDF outlining the bill. They can save the PDF or print it as they see fit.
- A Secure Link to Pay the amount. Depending on the payment method you have access to, or has allowed them to pay by, they will enter their payment details and process the payment on their own. When this happens, the Invoice will be marked paid, and you will be funded as usual after settlement.
Was this article helpful?
That’s Great!
Thank you for your feedback
Sorry! We couldn't be helpful
Thank you for your feedback
Feedback sent
We appreciate your effort and will try to fix the article